# install.packages("openxlsx2")
library(openxlsx2)
# create a workbook from scratch
wb <- wb_workbook(title = "A demo workbook")

wb <- wb_add_worksheet(wb, sheet = "my data")Creating cool xlsx files with openxlsx2 1.0
This is my first blog post. Feel free to connect with me on Mastodon fosstodon.org/@olivroy or on GitHub @olivroy.
Style workbooks with openxlsx2
Abstract
This blog post talks about openxlsx2 and its 1.0 release. It also showcases a minimal example on how to style an xlsx file using the package. Many topics are not covered in the post as openxlsx2 offers many features, but you can find about it on the openxlsx2 package website (which was completely revamped ahead of the 1.0 release).
About openxlsx2
The openxlsx2 package can be used to read and write xlsx files. It is a successor to the popular openxlsx package1, with significant improvements. See Section 2.1. openxlsx2 is a package created by Jan Marvin Garbuszus and Jordan Mark Barbone, but I personally recently had the chance to contribute to the package recently. My personal contributions were especially in improving the documentation of functions and the vignettes. If you are familiar with openxlsx and want to upgrade to openxlsx2, there is a vignette just for that.
Version 1.0 of openxlsx2 was released to CRAN on August 25, 2023 with significant documentation improvement and a mature API after almost two years of intensive work by the package authors.
In addition to editing workbooks, openxlsx2 can be used to read content in R (like the readxl package) and write R content to xlsx. (similar to the writexl package), but with more flexibility.
Install the package
Let us know what you think by opening starting a discussion on GitHub. If you encounter something that does not work as expected, please open a GitHub issue.
Style workbooks with openxlsx2
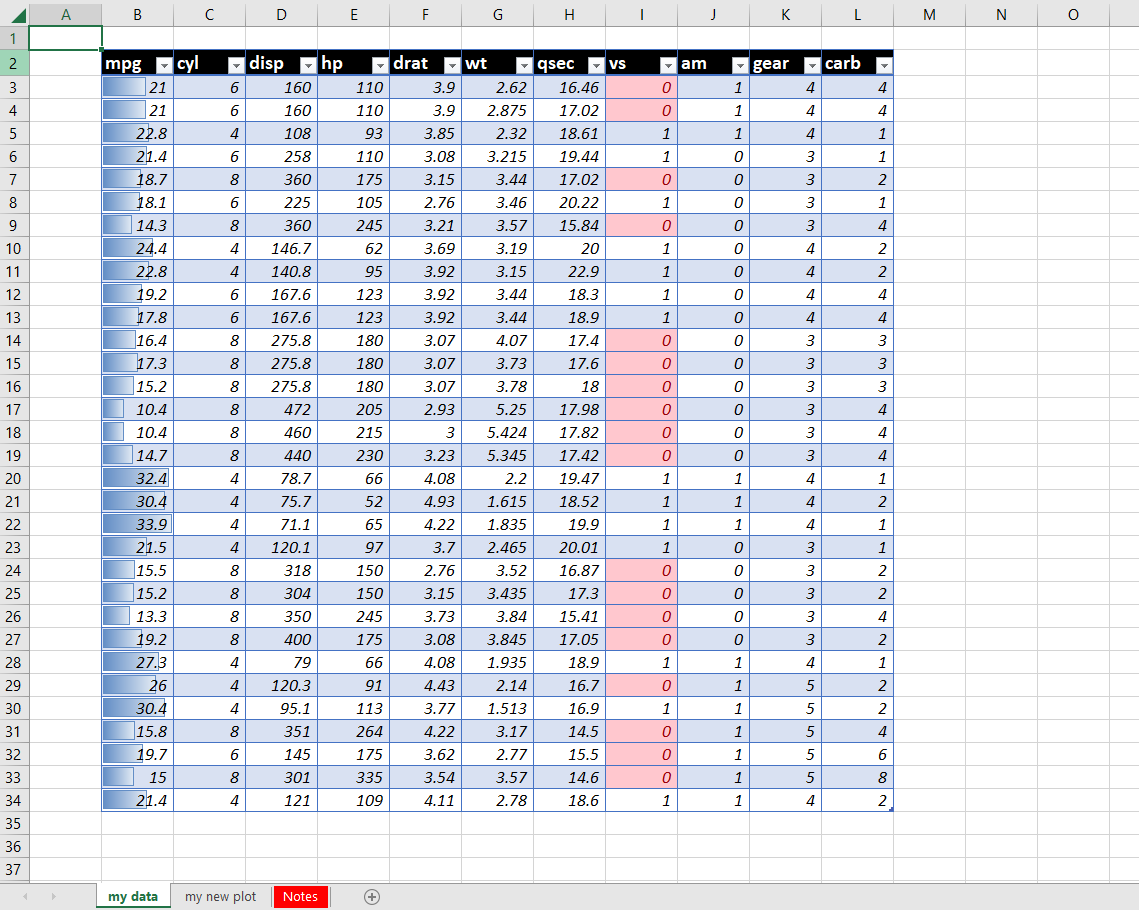
This example displays how you can quickly create a xlsx workbook with openxlsx2.
Note that many of the arguments supplied here are optional and are used for the benefit of the tutorial.
The resulting workbook is the following.
- Intialize your workbook
- Add content.
# start writing a banded data table from the B2 cell.
wb$add_data_table(x = mtcars, dims = "B2", banded_rows = TRUE, table_style = "TableStyleLight16")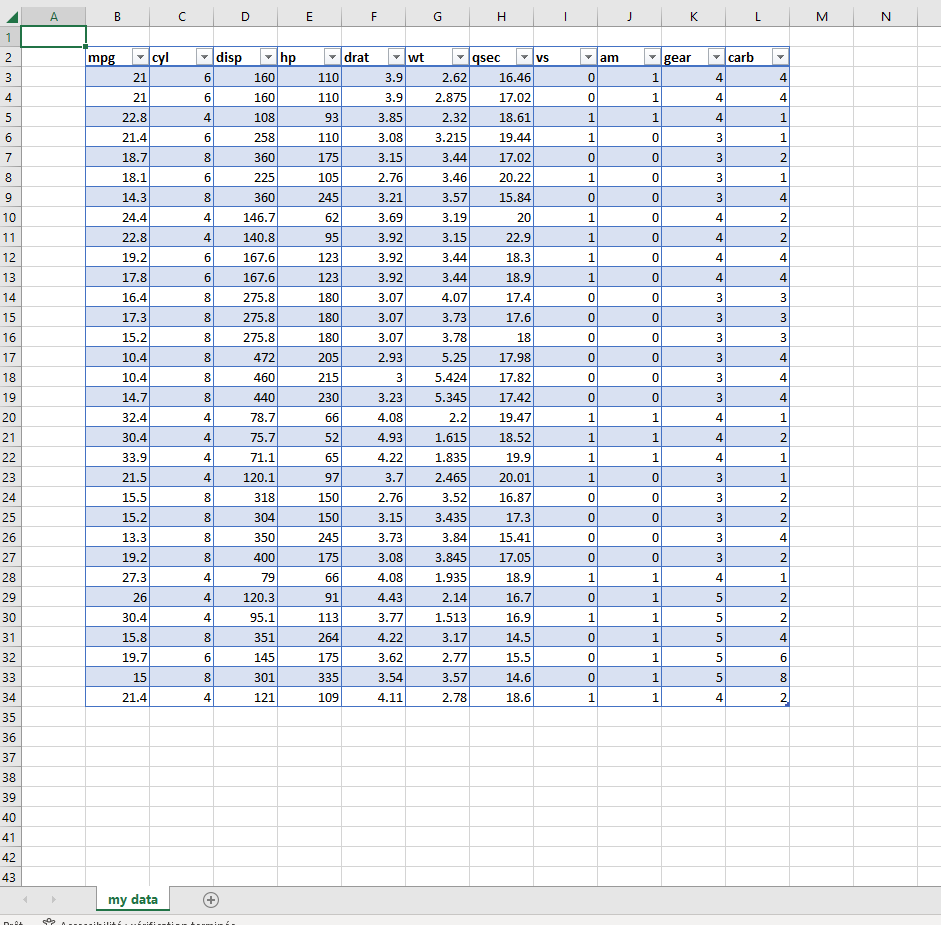
- Add style to the content
You can use wb_dims() to help you add things relative to the object.2
# use Excel's dimensions for mtcars
# As we want to write mtcars starting in cell B2
# It helps keeping the cells relative to x. (the data)
f_dims <- function(..., select = NULL) {
  wb_dims(x = mtcars, from_row = 2, from_col = "B", ..., select = select)
}- Add conditional formatting
# Add data bars to the mpg column
wb <- wb |> wb_add_conditional_formatting(dims = f_dims(cols = "mpg"), type = "dataBar")
wb$add_conditional_formatting(dims = f_dims(cols = "vs"), rule = "=0")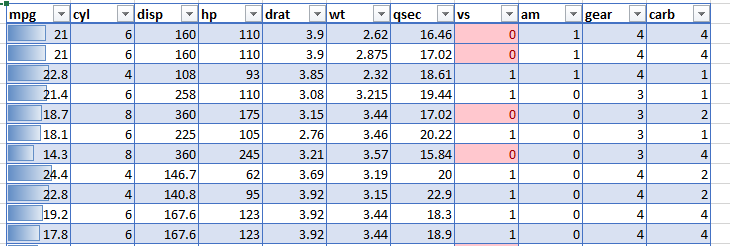
- Change the font and fill of different parts of the data.
# Modify column names appearance
wb$add_fill(dims = f_dims(select = "col_names"), color = wb_color("black"))
wb$add_font(dims = f_dims(select = "col_names"), color = wb_color("white"), size = 13, bold = TRUE)

# modify data appearance (not column names)
wb$add_font(dims = f_dims(select = "data"), italic = TRUE)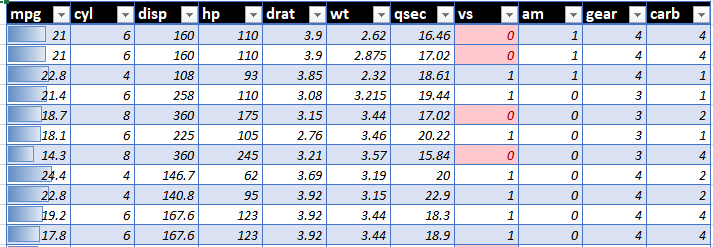
- Add images
# Create a plot
library(ggplot2)

p1 <- ggplot(mtcars, aes(mpg, hp)) +
  geom_point(color = "turquoise3") +
  theme_light(base_size = 15) +
  labs(title = "A plot to add to an xlsx file") +
  theme(title = element_text(face = "bold", size = 20), axis.title = element_text(color = "gray32", face = "plain"))


# You can also pipe functions with the wb_* prefix
# this will have better autocompletion!
# Add to a new worksheet
wb <- wb |> wb_add_worksheet(sheet = "my new plot", grid_lines = FALSE)
# needs to be in displaying
print(p1)
wb <- wb |> wb_add_plot(dims = "A2", width = 16, height = 10)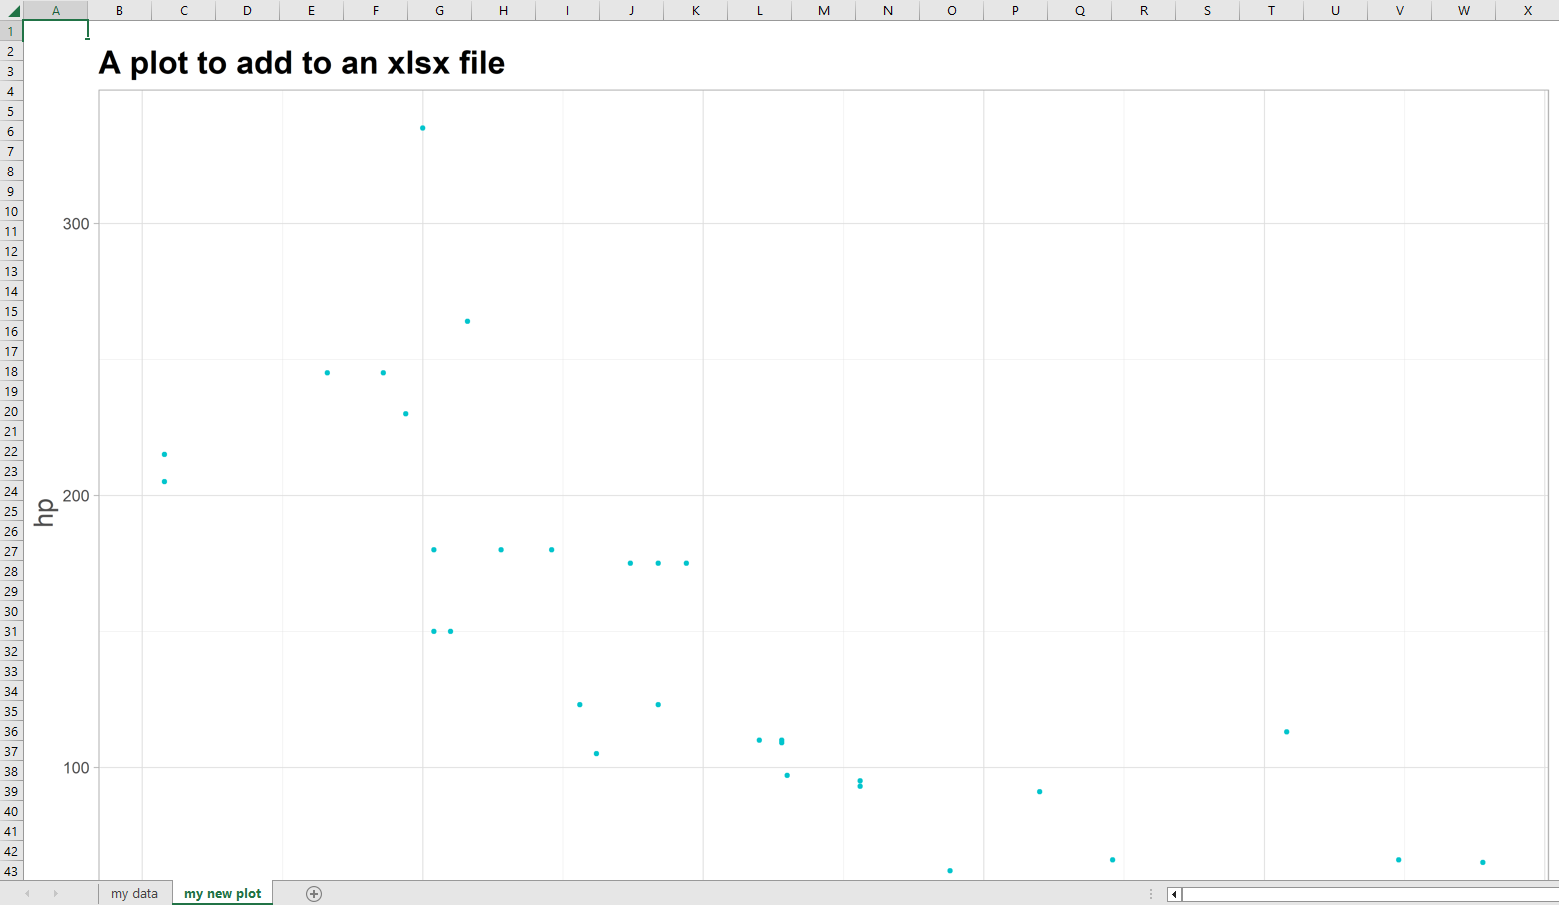
- Other showcase of styling
notes <- c("Note", "this worksheet was produced on this day in R.")
wb <- wb |> wb_add_worksheet(sheet = "Notes", zoom = 250, tab_color = "red")
wb <- wb |>
  wb_add_data(x = notes) |>
  wb_add_font(dims = "A1:A2", size = 20, bold = TRUE) |>
  wb_set_col_widths(cols = 1, widths = 40) |>
  wb_add_cell_style(dims = "A2", wrap_text = TRUE)
- Preview and save to file.
# Preview
wb$open()
# Save
# wb_save(wb, "a file.xlsx")
Why switch to openxlsx2?
- It requires less typing (Yay🎉!!)
- Consistent
wb_*prefix to all functions to help with autocomplete. - No need to provide the
sheetargument in every call as openxlsx2 tries to guess the appropriate one.3 - It provides many way to interact
- Can use with the pipe
|>or%>%as well as chaining - All arguments have consistent names and were renamed to snake case in v0.8
- Specify the positioning of elements with a consistent
dimsargument, that is present in most functions.wb_dims()is a helper for that. - Has many new features including:
- adding threaded comments with
wb_add_thread() - applying a default theme to a workbook
- consistent
dimsargument to specify a cell range. - adding checkbox or radio buttons with
wb_add_form_control() - and many others
- adding threaded comments with
Conclusion
With the work done on the package, we hope that openxlsx2 can be a good successor to openxlsx, and make life a little less painful for persons who ~love R~ hate Excel to deal with messy xlsx file and create less messy ones with clean code.
openxlsx2 is always looking for improvement and we will continue its development, so feel free to send feature requests on GitHub.
All code
# install.packages("pak")
pak::pak("openxlsx2")
# install.packages("openxlsx2")
library(openxlsx2)
# create a workbook from scratch
wb <- wb_workbook(title = "A demo workbook")

wb <- wb_add_worksheet(wb, sheet = "my data")
# start writing a banded data table from the B2 cell.
wb$add_data_table(x = mtcars, dims = "B2", banded_rows = TRUE, table_style = "TableStyleLight16")
# use Excel's dimensions for mtcars
# As we want to write mtcars starting in cell B2
# It helps keeping the cells relative to x. (the data)
f_dims <- function(..., select = NULL) {
  wb_dims(x = mtcars, from_row = 2, from_col = "B", ..., select = select)
}
# Add data bars to the mpg column
wb <- wb |> wb_add_conditional_formatting(dims = f_dims(cols = "mpg"), type = "dataBar")
wb$add_conditional_formatting(dims = f_dims(cols = "vs"), rule = "=0")
# Modify column names appearance
wb$add_fill(dims = f_dims(select = "col_names"), color = wb_color("black"))
wb$add_font(dims = f_dims(select = "col_names"), color = wb_color("white"), size = 13, bold = TRUE)

# modify data appearance (not column names)
wb$add_font(dims = f_dims(select = "data"), italic = TRUE)
# Create a plot
library(ggplot2)

p1 <- ggplot(mtcars, aes(mpg, hp)) +
  geom_point(color = "turquoise3") +
  theme_light(base_size = 15) +
  labs(title = "A plot to add to an xlsx file") +
  theme(title = element_text(face = "bold", size = 20), axis.title = element_text(color = "gray32", face = "plain"))


# You can also pipe functions with the wb_* prefix
# this will have better autocompletion!
# Add to a new worksheet
wb <- wb |> wb_add_worksheet(sheet = "my new plot", grid_lines = FALSE)
# needs to be in displaying
print(p1)
wb <- wb |> wb_add_plot(dims = "A2", width = 16, height = 10)
notes <- c("Note", "this worksheet was produced on this day in R.")
wb <- wb |> wb_add_worksheet(sheet = "Notes", zoom = 250, tab_color = "red")
wb <- wb |>
  wb_add_data(x = notes) |>
  wb_add_font(dims = "A1:A2", size = 20, bold = TRUE) |>
  wb_set_col_widths(cols = 1, widths = 40) |>
  wb_add_cell_style(dims = "A2", wrap_text = TRUE)
# Preview
wb$open()
# Save
# wb_save(wb, "a file.xlsx")

# all code
Footnotes
openxlsx2 is a fork of openxlsx.↩︎
It is also possible to provide dims directly, but there are limitations, especially, if your data does not start at cell “A1” or if your data has row names↩︎
openxlsx2 uses waiver functions to guess what sheet you want to write to. Defaults to
current_sheet()when you write things andnext_sheet()when you create a new sheet.↩︎